Adding links to the home page left panel
This guide will walk you through adding a link to the left panel on the O3 home page. The O3 home page left panel contains links to various apps. Clicking a link typically navigates to the app’s landing screen.
Example: Adding a link for the Patient Lists app
This guide will walk you through adding a link to the Patient Lists app, which is a frontend module that’s part of the O3 Patient Management monorepo. The Patient Lists app handles the creation and management of patient lists. This app has a landing screen that displays saved lists and a create-list workspace. Clicking a list navigates to the list details screen.
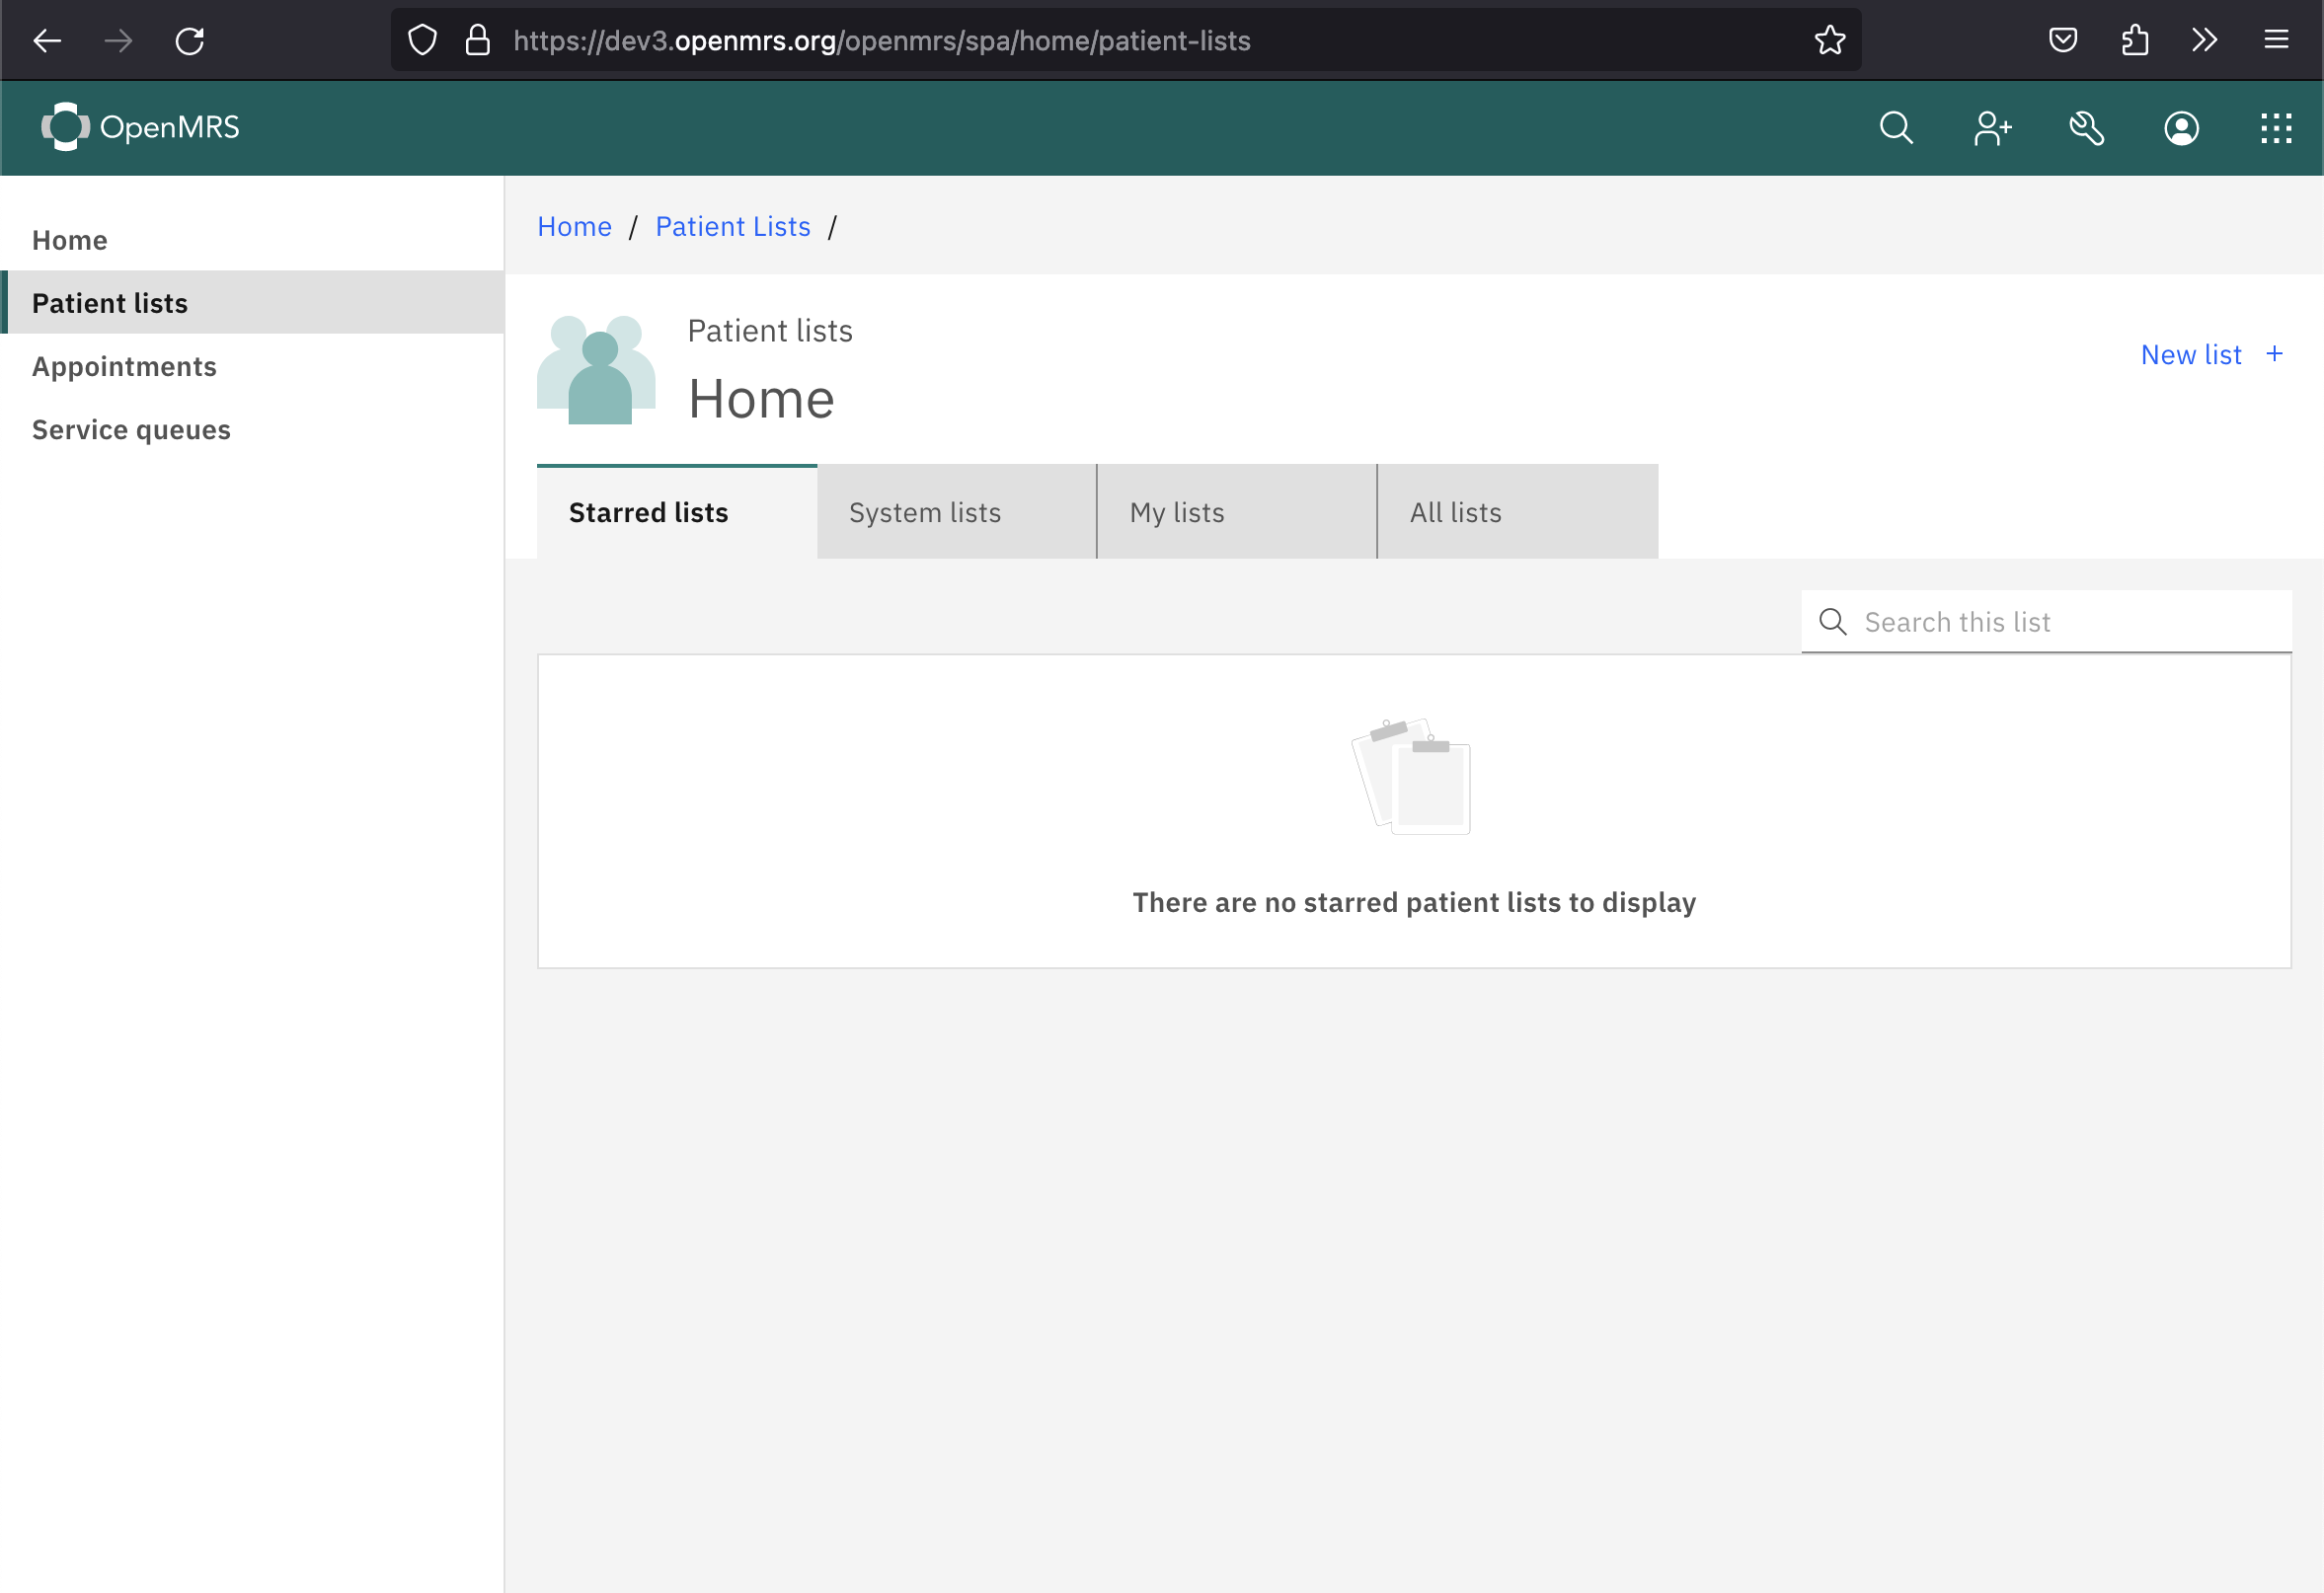
Below is a screenshot of the Patient Lists app landing screen:
To achieve this, we’ll need to follow these steps:
Step 1: Set up routing for the Patient Lists app
We’ll begin by making sure that the Patient Lists app is properly set up to handle routing. Its Root component should look like this:
import React, { useEffect, useRef } from "react";
import { BrowserRouter, Route, Routes, useSearchParams } from "react-router-dom";
import { WorkspaceContainer, launchWorkspace2 } from "@openmrs/esm-framework";
import ListDetails from "./list-details/list-details.component";
import ListsDashboard from "./lists-dashboard/lists-dashboard.component";

function AutoLaunchPatientListWorkspace() {
  const [searchParams, setSearchParams] = useSearchParams();
  const hasOpenedRef = useRef(false);

  useEffect(() => {
    const shouldOpenCreate = searchParams.has("create") || searchParams.has("new_cohort");
    if (shouldOpenCreate && !hasOpenedRef.current) {
      hasOpenedRef.current = true;
      const rafId = requestAnimationFrame(() => {
        launchWorkspace2("patient-list-form-workspace");
        setSearchParams({}, { replace: true });
      });
      return () => cancelAnimationFrame(rafId);
    }
  }, [searchParams, setSearchParams]);

  return null;
}

function RootComponent() {
  const basename = window.getOpenmrsSpaBase() + "home/patient-lists";

  return (
    <BrowserRouter basename={basename}>
      <AutoLaunchPatientListWorkspace />
      <Routes>
        <Route path="/" element={<ListsDashboard />} />
        <Route path="/:patientListUuid" element={<ListDetails />} />
      </Routes>
      <WorkspaceContainer contextKey="patient-lists" />
    </BrowserRouter>
  );
}

export default RootComponent;
This BrowserRouter configuration lets O3 render the Patient Lists app landing screen at home/patient-lists and the list details screen at home/patient-lists/:patientListUuid. The workspace container keeps Patient Lists workspaces scoped to this page. The optional AutoLaunchPatientListWorkspace helper preserves compatibility with links that open the create-list workspace through query parameters.
Step 2: Add a Patient lists link to the left panel
We’ll begin by creating a dashboard metadata file and a helper function to create the dashboard link. First, create a dashboard.meta.ts file:
export const dashboardMeta = {
  path: 'patient-lists',
  slot: 'patient-lists-dashboard-slot',
  title: 'patientLists',
  basePath: `${window.spaBase}/home`,
} as const;
Next, create a createDashboardLink.tsx file:
import React from 'react';
import { BrowserRouter } from 'react-router-dom';
import { DashboardExtension, type DashboardExtensionProps, type IconId } from '@openmrs/esm-framework';

export const createDashboardLink = (config: Omit<DashboardExtensionProps, 'icon'> & { icon?: IconId }) => () => (
  <BrowserRouter>
    <DashboardExtension path={config.path} title={config.title} basePath={config.basePath} icon={config.icon} />
  </BrowserRouter>
);Note: The icon property is optional. If provided, it should be a valid Carbon icon name (e.g., "Calendar", "User", "List"). The icon will be displayed next to the link text in the left panel.
DashboardExtension translates the title value with useTranslation(). Keep a matching t() comment near the lifecycle export so translation extraction can find the display text.
Now, add a named export to the Patient Lists app index.ts file:
import { defineConfigSchema, getAsyncLifecycle, getSyncLifecycle } from "@openmrs/esm-framework";
import { configSchema } from "./config-schema";
import { createDashboardLink } from "./createDashboardLink";
import { dashboardMeta } from "./dashboard.meta";
import { setupOffline } from "./offline";

const moduleName = '@openmrs/esm-patient-list-management-app';

const options = {
  featureName: 'patient list',
  moduleName,
};

export const importTranslation = require.context("../translations", false, /.json$/, "lazy");

export function startupApp() {
  setupOffline();
  defineConfigSchema(moduleName, configSchema);
}

export const root = getAsyncLifecycle(() => import('./root.component'), options);

// t('patientLists', 'Patient lists')
export const patientListDashboardLink = getSyncLifecycle(createDashboardLink(dashboardMeta), options);The root component typically uses getAsyncLifecycle for code splitting. The dashboard link uses getSyncLifecycle because it is lightweight and needs to be available as soon as the home page left panel renders.
Step 3: Wire up the Patient lists link extension to the home page left panel
Next, we’ll need to wire up the Patient lists link extension to the left panel. To do this, we’ll need to add the following extension definition to the Patient Lists app routes.json file:
{
  "$schema": "https://json.openmrs.org/routes.schema.json",
  "backendDependencies": {
    "webservices.rest": ">=2.2.0"
  },
  "extensions": [
    {
      "name": "patient-lists-dashboard-link",
      "component": "patientListDashboardLink",
      "slot": "homepage-dashboard-slot",
      "meta": {
        "name": "patient-lists",
        "slot": "patient-lists-dashboard-slot",
        "title": "Patient lists"
      }
    },
    {
      "name": "patient-lists-dashboard",
      "component": "root",
      "slot": "patient-lists-dashboard-slot"
    },
    {
      "name": "list-details-table",
      "component": "listDetailsTable"
    },
    {
      "name": "add-patient-to-patient-list-button",
      "component": "addPatientToPatientListMenuItem",
      "slot": "patient-actions-slot"
    }
    // ...
  ]
}
Some things to note:
- The
componentproperty is set topatientListDashboardLink, which is the named export that we defined in the previous step. - The
nameproperty is set topatient-lists-dashboard-link, which is the name of the extension. - The
slotproperty is set tohomepage-dashboard-slot, which is the name of the slot that we want to add the extension to. This slot is where the links that are displayed on the left panel of the O3 home page are rendered. - The
metaproperty contains the dashboard configuration that the shell can inspect:- The
nameproperty is set topatient-lists, which is the path segment used in the URL. - The
slotproperty is set topatient-lists-dashboard-slot, which is the name of the slot where the Patient Lists app dashboard content will be rendered. - The
titleproperty is set toPatient lists, which is human-readable dashboard metadata. The rendered link text comes from thetitlevalue passed toDashboardExtensionindashboardMeta.
- The
The second extension definition registers the root component to render in the patient-lists-dashboard-slot when the Patient Lists app is active.
Step 4: Profit!
That’s it! You should now see a Patient lists link on the left panel of the O3 home page. Clicking on this link should navigate you to the Patient Lists app landing screen.