Adding a left panel
The left panel provides navigation within an app in O3. It is based on Carbon’s UI shell left panel and is positioned below the header, fixed to the left edge of the page.
This guide uses the Bed Management app from the O3 Patient Management monorepo as the reference implementation. Bed Management has several closely related screens, so it is a good example of when an app-level left panel is useful.
Example: Adding a left panel to the Bed Management app
The Bed Management app has these screens:
- A landing screen that summarizes beds by location.
- A detail screen for a specific location.
- A bed allocation administration screen.
- Bed type and bed tag administration screens.
The left panel exposes these links:
Summaryfor the landing screen and location detail screen.Bed allocationfor bed administration.Bed typesfor bed type administration.Bed tagsfor bed tag administration.
Below is a screenshot of how the app looks:

To achieve this, follow the steps below:
Step 1: Register the left panel from the page root
Begin by updating the app root component that sets up routing:
import React from "react";
import { BrowserRouter, Route, Routes } from "react-router-dom";
import { useLeftNav, WorkspaceContainer } from "@openmrs/esm-framework";
import BedAdministrationTable from "./bed-administration/bed-administration-table.component";
import BedTagAdministrationTable from "./bed-tag/bed-tag-administration-table.component";
import BedTypeAdministrationTable from "./bed-type/bed-type-administration-table.component";
import Home from "./home.component";
import LeftPanel from "./left-panel/left-panel.component";
import WardWithBeds from "./ward-with-beds/ward-with-beds.component";
import styles from "./root.scss";

function Root() {
  const spaBasePath = window.spaBase;
  const bedManagementBasename = window.getOpenmrsSpaBase() + "bed-management";

  useLeftNav({ name: "bed-management-left-panel-slot", basePath: spaBasePath });

  return (
    <BrowserRouter basename={bedManagementBasename}>
      <LeftPanel />
      <main className={styles.container}>
        <Routes>
          <Route path="/" element={<Home />} />
          <Route path="/location/:location" element={<WardWithBeds />} />
          <Route path="/bed-administration" element={<BedAdministrationTable />} />
          <Route path="/bed-tags" element={<BedTagAdministrationTable />} />
          <Route path="/bed-types" element={<BedTypeAdministrationTable />} />
        </Routes>
      </main>
      <WorkspaceContainer contextKey="bed-management" />
    </BrowserRouter>
  );
}

export default Root;
Some key things to note:
useLeftNav()registers the active left-nav slot with O3 while the page is mounted, and unregisters it when the page unmounts. Use this hook from page components, not extension components.nameis the extension slot that will receive the left-panel links. This same slot name is used inroutes.json.basePathis the SPA base path,/openmrs/spaby default.- The app renders its own
LeftPanelcomponent instead of renderingLeftNavMenudirectly. Direct use ofLeftNavMenuoutside the shell header is deprecated in the framework. WorkspaceContainerkeeps Bed Management workspaces scoped to this page.
Step 2: Render a Carbon side nav with an extension slot
Create a LeftPanel component that renders on desktop layouts and provides the slot where the link extensions will appear:
import React from "react";
import { useTranslation } from "react-i18next";
import { SideNav } from "@carbon/react";
import { attach, ExtensionSlot, isDesktop, useLayoutType } from "@openmrs/esm-framework";
import styles from "./left-panel.scss";

attach("nav-menu-slot", "bed-management-left-panel");

function LeftPanel() {
  const { t } = useTranslation();
  const layout = useLayoutType();

  return (
    isDesktop(layout) && (
      <SideNav
        aria-label={t("bedManagementLeftPanel", "Bed management left panel")}
        className={styles.leftPanel}
        expanded
      >
        <ExtensionSlot name="bed-management-left-panel-slot" />
      </SideNav>
    )
  );
}

export default LeftPanel;
The ExtensionSlot name must match the slot registered with useLeftNav() and the slot used by the link extensions in routes.json.
Step 3: Wire up the root page
Export the root component from index.ts and register any configuration schema during startup:
import { defineConfigSchema, getAsyncLifecycle } from "@openmrs/esm-framework";
import { configSchema } from "./config-schema";

const moduleName = "@openmrs/esm-bed-management-app";

const options = {
  featureName: "bed-management",
  moduleName,
};

export const importTranslation = require.context("../translations", false, /.json$/, "lazy");

export function startupApp() {
  defineConfigSchema(moduleName, configSchema);
}

export const root = getAsyncLifecycle(() => import("./root.component"), options);
Then add the page route to routes.json:
{
  "$schema": "https://json.openmrs.org/routes.schema.json",
  "backendDependencies": {
    "fhir2": ">=1.2",
    "webservices.rest": ">=2.2.0"
  },
  "pages": [
    {
      "component": "root",
      "route": "bed-management"
    }
  ]
}
This page definition tells O3 to render the root lifecycle when you navigate to /openmrs/spa/bed-management.
Step 4: Add links to the left panel
Create one lifecycle export for each link:
import { getSyncLifecycle } from "@openmrs/esm-framework";
import { createLeftPanelLink } from "./left-panel-link.component";

export const summaryLeftPanelLink = getSyncLifecycle(
  createLeftPanelLink({
    name: "bed-management",
    // t("summary", "Summary")
    title: "Summary",
  }),
  options
);

export const adminLeftPanelLink = getSyncLifecycle(
  createLeftPanelLink({
    name: "bed-administration",
    // t("bedAllocation", "Bed allocation")
    title: "Bed allocation",
  }),
  options
);

export const bedTypeLeftPanelLink = getSyncLifecycle(
  createLeftPanelLink({
    name: "bed-types",
    // t("bedTypes", "Bed types")
    title: "Bed types",
  }),
  options
);

export const bedTagLeftPanelLink = getSyncLifecycle(
  createLeftPanelLink({
    name: "bed-tags",
    // t("bedTags", "Bed tags")
    title: "Bed tags",
  }),
  options
);Keep the t() comments near static link titles so translation extraction can find them. If a link needs runtime translation logic, handle useTranslation() inside the rendered link component rather than inside getSyncLifecycle().
The createLeftPanelLink helper renders a ConfigurableLink and marks it active when its name matches the current URL segment:
import React, { useMemo } from "react";
import classNames from "classnames";
import { last } from "lodash-es";
import { BrowserRouter, useLocation } from "react-router-dom";
import { ConfigurableLink } from "@openmrs/esm-framework";

export interface LinkConfig {
  name: string;
  title: string;
}

function LinkExtension({ config }: { config: LinkConfig }) {
  const { name, title } = config;
  const location = useLocation();

  let urlSegment = useMemo(() => decodeURIComponent(last(location.pathname.split("/"))), [location.pathname]);

  const isUUID = (value) => {
    const regex = /^[0-9a-fA-F]{8}\b-[0-9a-fA-F]{4}\b-[0-9a-fA-F]{4}\b-[0-9a-fA-F]{4}\b-[0-9a-fA-F]{12}$/;
    return regex.test(value);
  };

  if (isUUID(urlSegment)) {
    urlSegment = "bed-management";
  }

  return (
    <ConfigurableLink
      to={`${window.getOpenmrsSpaBase()}bed-management${name && name !== "bed-management" ? `/${name}` : ""}`}
      className={classNames("cds--side-nav__link", name === urlSegment && "active-left-nav-link")}
    >
      {title}
    </ConfigurableLink>
  );
}

export const createLeftPanelLink = (config: LinkConfig) => () => (
  <BrowserRouter>
    <LinkExtension config={config} />
  </BrowserRouter>
);
When the last URL segment is a location UUID, the helper treats the current section as bed-management so the Summary link remains active on location detail pages.
Step 5: Add the link extensions to routes.json
Add the link exports to the extensions array:
"extensions": [
  {
    "component": "adminCardLink",
    "name": "bed-management-admin-card-link",
    "slot": "system-admin-page-card-link-slot"
  },
  {
    "component": "adminLeftPanelLink",
    "name": "bed-administration-left-panel-link",
    "slot": "bed-management-left-panel-slot"
  },
  {
    "component": "bedTypeLeftPanelLink",
    "name": "bed-type-left-panel-link",
    "slot": "bed-management-left-panel-slot"
  },
  {
    "component": "bedTagLeftPanelLink",
    "name": "bed-tag-left-panel-link",
    "slot": "bed-management-left-panel-slot"
  },
  {
    "component": "summaryLeftPanelLink",
    "name": "bed-management-home-dashboard-link",
    "slot": "bed-management-left-panel-slot",
    "order": 0
  }
]
Step 6: Try it out
Navigate to /openmrs/spa/bed-management. You should see the Bed Management landing screen with the left panel:
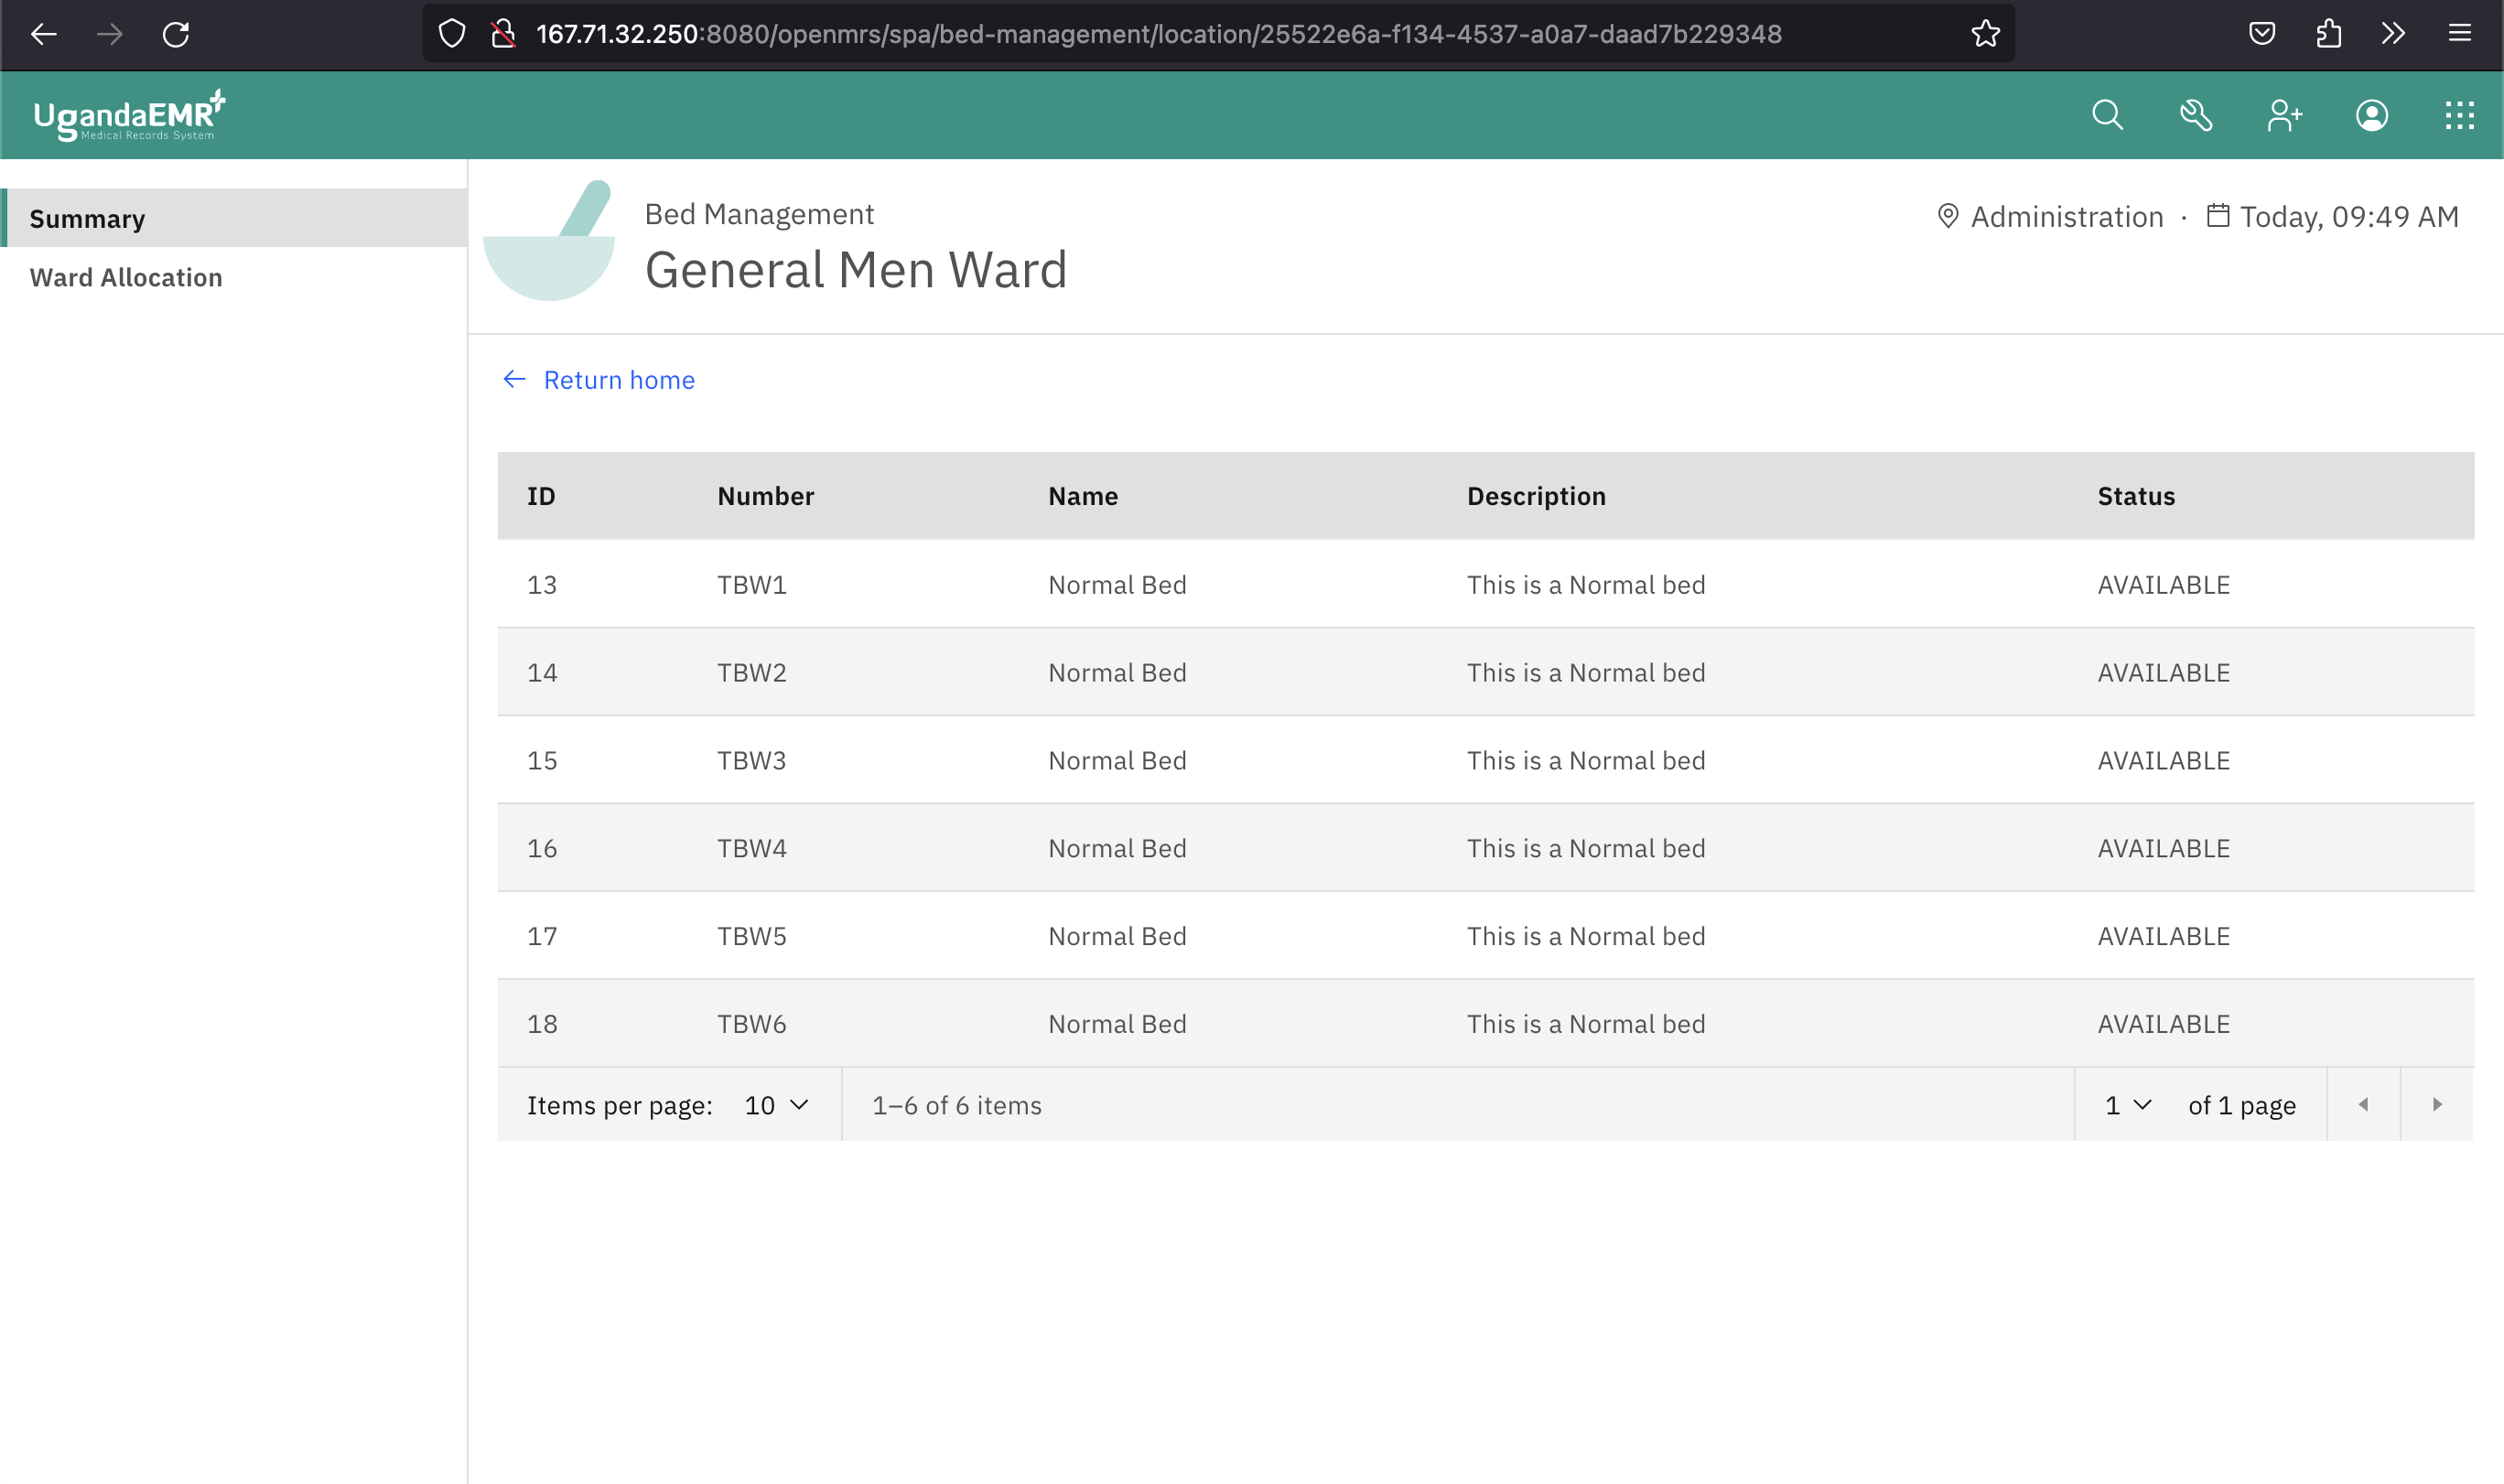
Clicking a location card navigates to a location detail page and keeps the Summary link active:
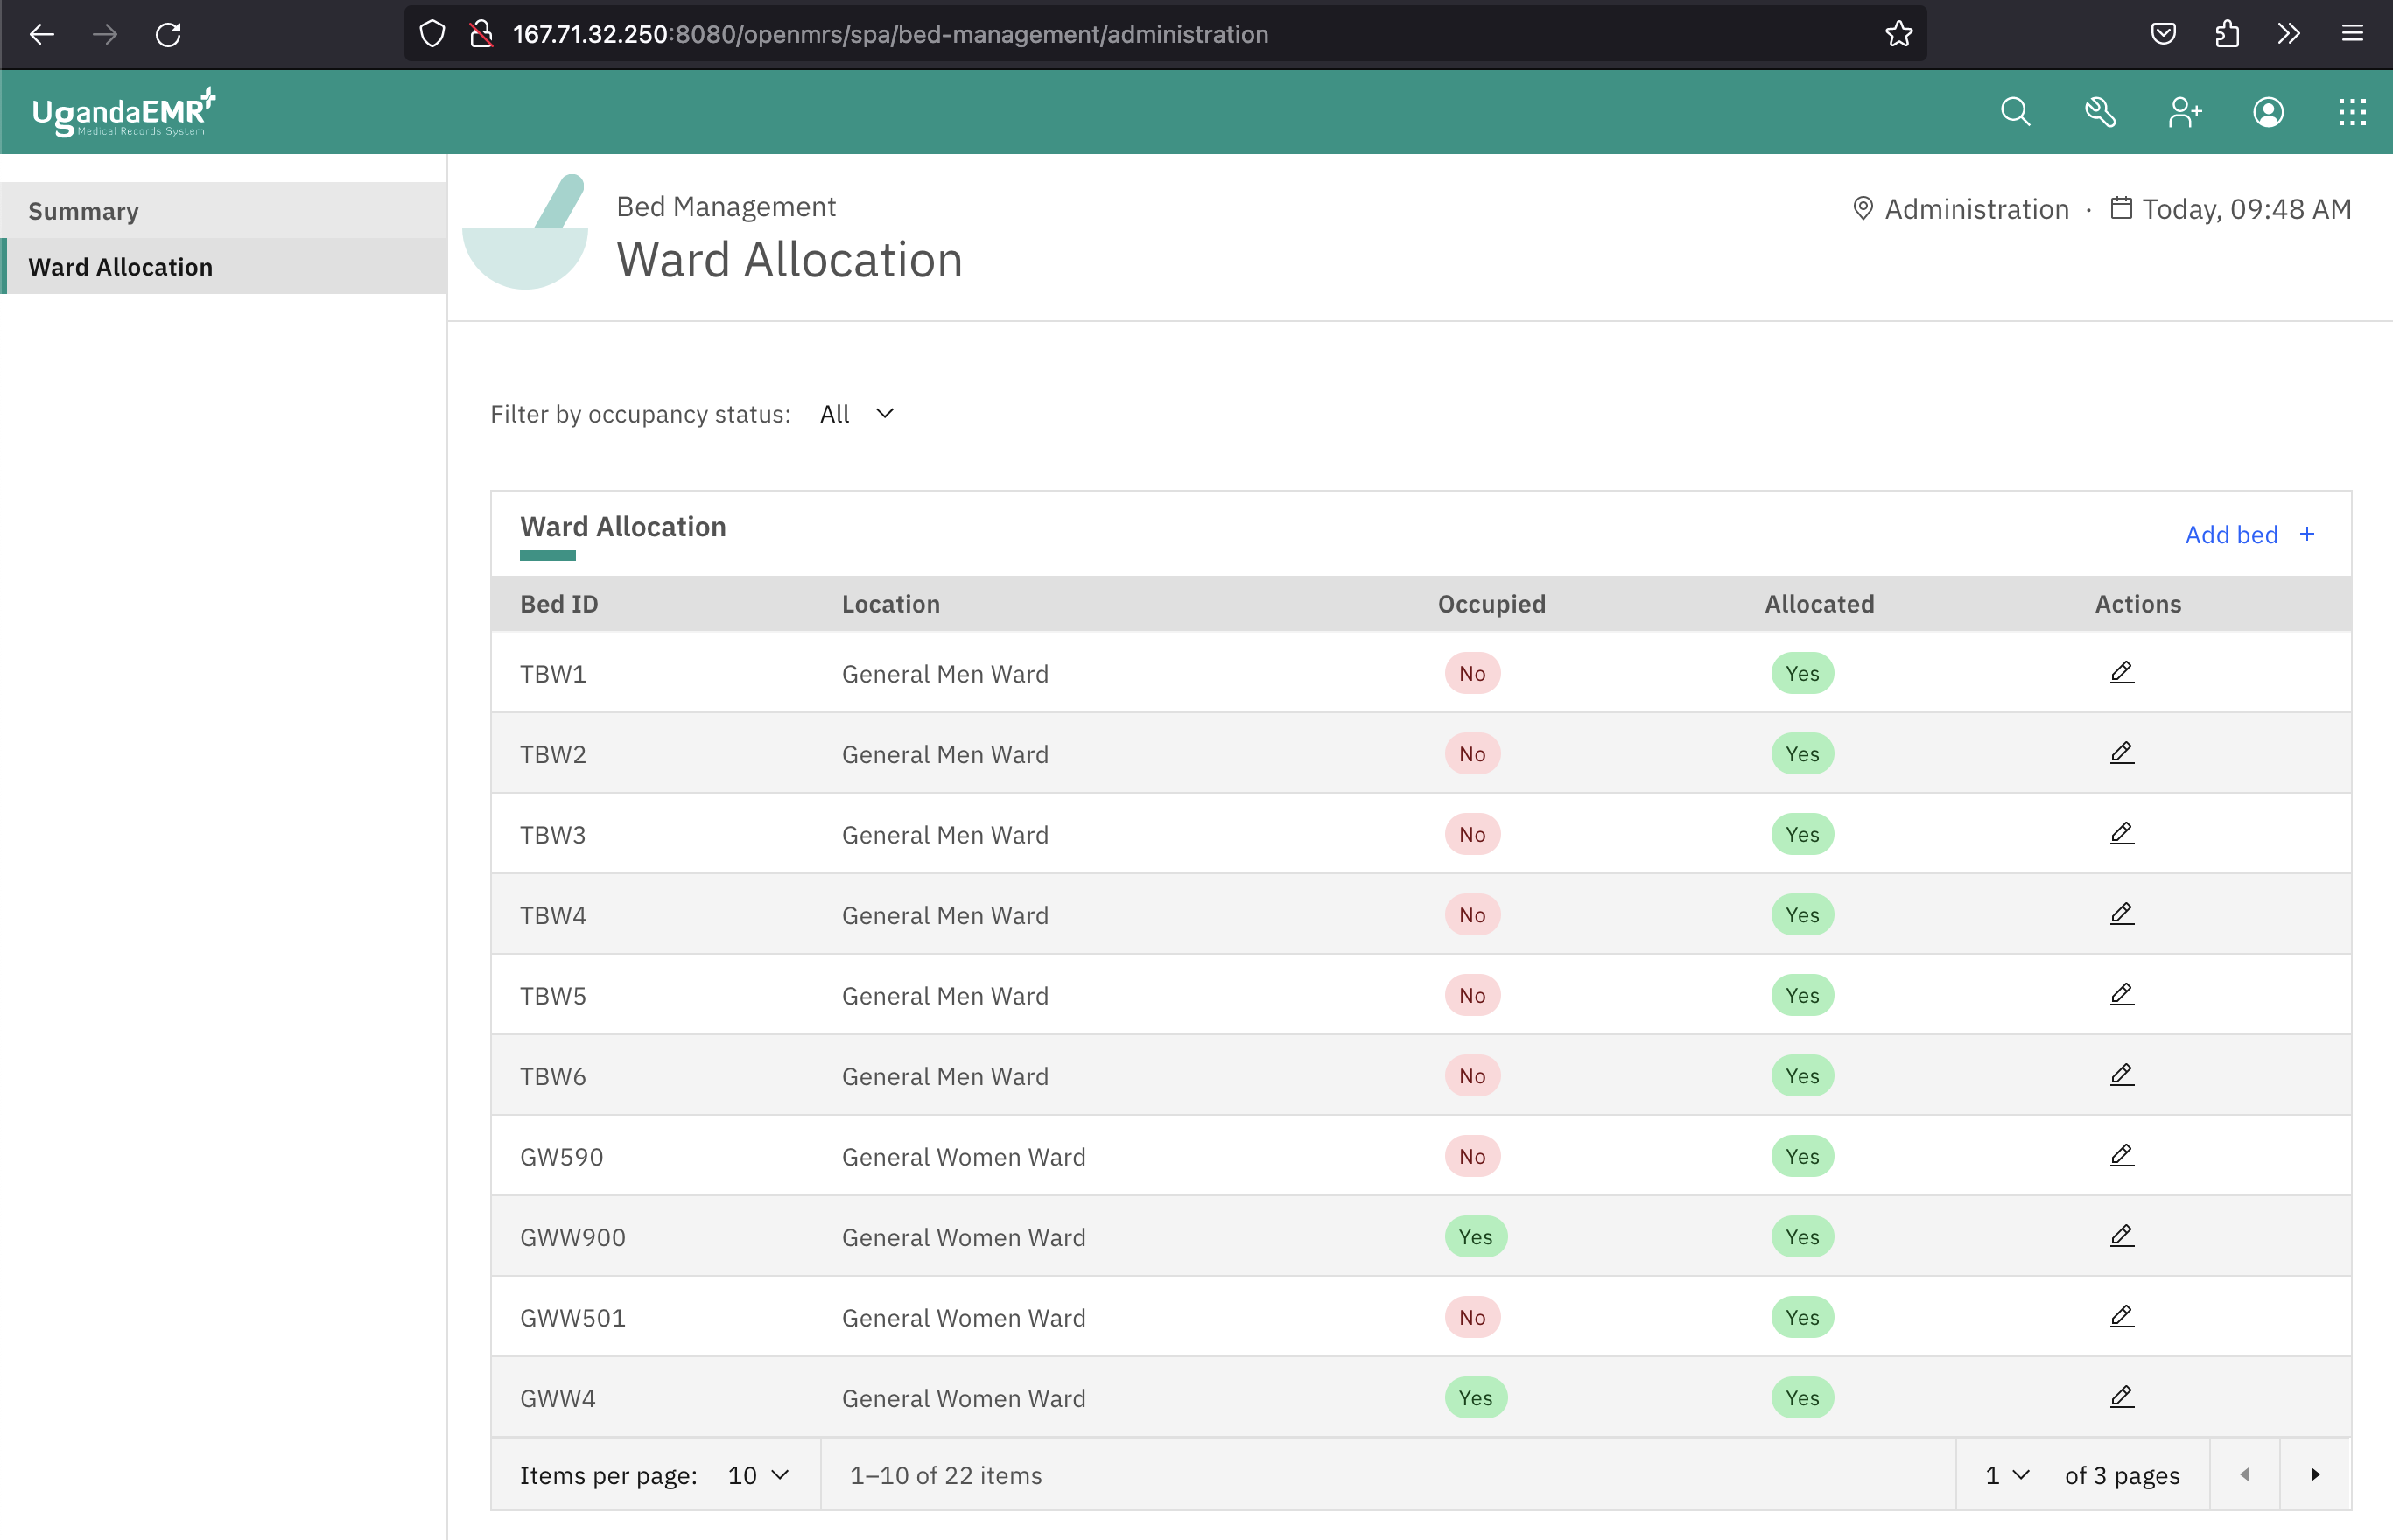
Clicking Bed allocation opens the administration page: