Configuring branding
Implementers can configure various aspects of the user interface to match their branding. This includes:
- Changing the logo on the login screen
- Changing the logo on the navbar
- Changing the login page background
- Adding login page announcements
- Changing brand colors
- Changing the favicon
- Setting the implementation name (displayed in page headers)
- Setting the page title (browser tab title)
Changing logos
Logos are used in several places in O3:
- The login page (main logo)
- The login page footer (additional logos, optional)
- The navbar (main navigation logo)
The default logo used in the O3 login page is the OpenMRS SVG sprite. You can override it by providing a valid image src URL as the value of src property in the login frontend module’s configuration schema. Supported image formats include SVG, PNG, JPEG/JPG, GIF, WebP, and any other format supported by modern browsers. If src is empty or not provided, the default OpenMRS logo will be displayed. Below is a snippet of how this could look like:
{
  "@openmrs/esm-login-app": {
    "logo": {
      "src": "https://data.kenyahmis.org/openmrs/images/logos/kenyaemr-logo.svg",
      "alt": "KenyaEMR logo"
    }
  }
}
In this example, the logo SVG specified at that URL will be applied as the default login page logo. To persist this change, you will need to commit this configuration to your instance’s frontend configuration. To do this in the distro reference application, you’ll need to:
Step 1
Add your resource to a directory in the distro. For example, a logo.png file can be added to the frontend/resources directory.
Step 2
Add this line to the Dockerfile in the frontend directory:
COPY ./resources/logo.png /usr/share/nginx/htmlThis will copy the logo to the root of the application.
Step 3
Add the following snippet to the config-core_demo.json file in the frontend directory:
Note that the paths to your configuration files might be different. Adjust the paths to match your application’s structure.
{
  "@openmrs/esm-login-app": {
    "logo": {
      "src": "${openmrsSpaBase}/logo.png",
      "alt": "Logo"
    }
  }
}
Step 4
Important: The config-core_demo.json file must be loaded by the SPA. You have two options:
Option A - Runtime configuration (recommended, no rebuild needed): Set the SPA_CONFIG_URLS environment variable in your docker-compose.yml to include the config file:
frontend:
  environment:
    SPA_CONFIG_URLS: /openmrs/spa/config-core_demo.json
Use the public path where your SPA is actually served. The Reference Application default is /openmrs/spa; if you set a different SPA_PATH, use that path in SPA_CONFIG_URLS.
Option B - Build-time configuration (requires rebuild): Add the config file URL to the configUrls array in spa-build-config.json:
{
  "configUrls": ["${openmrsSpaBase}/config-core_demo.json"]
}
This scopes the logo to the login app only.
Additional logos in login footer: You can also add multiple logos to the login page footer using the footer.additionalLogos configuration:
{
  "@openmrs/esm-login-app": {
    "footer": {
      "additionalLogos": [
        {
          "src": "/openmrs/spa/partner-logo-1.png",
          "alt": "Partner Organization"
        },
        {
          "src": "/openmrs/spa/partner-logo-2.png",
          "alt": "Funding Partner"
        }
      ]
    }
  }
}
Unlike the main login logo, footer logo src values are passed directly to the browser. Use an absolute URL or the
public path where your SPA is served, such as /openmrs/spa/... in the Reference Application default setup.
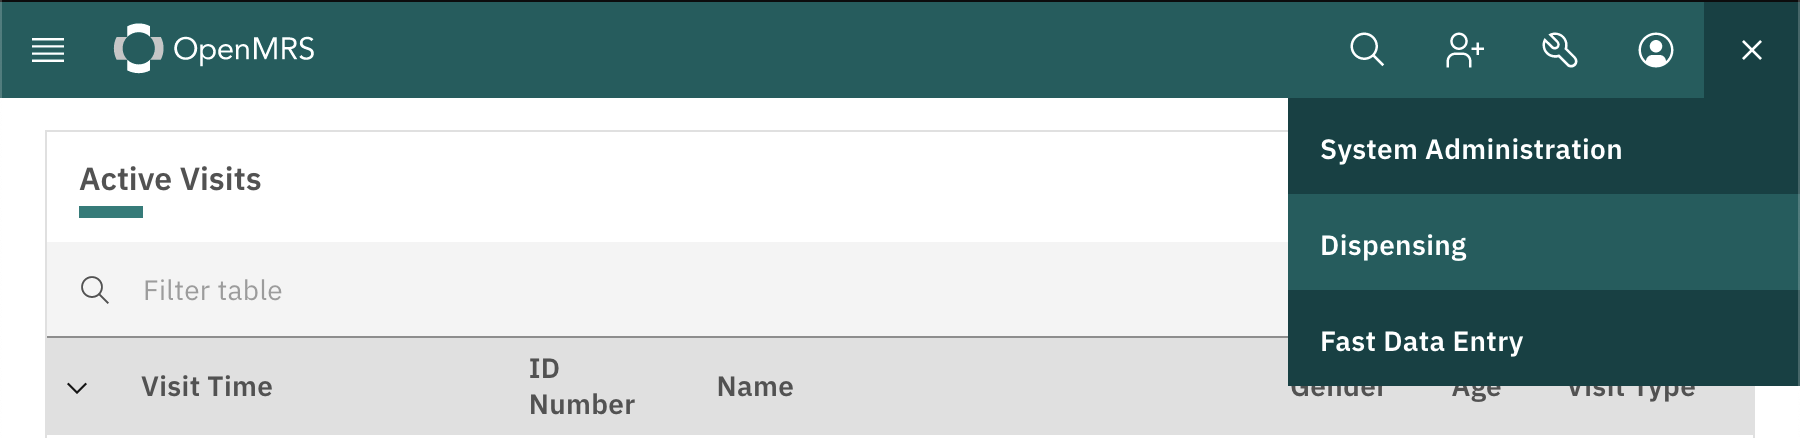
Changing the logo used in the navbar
The default logo used on the navbar is configured here . You can optionally use a string or an image file (SVG, PNG, JPEG/JPG, GIF, WebP, etc.) as the navbar logo. To override the navbar logo, use a configuration similar to the snippet below:
{
  "@openmrs/esm-primary-navigation-app": {
    "logo": {
      "src": "https://data.kenyahmis.org/openmrs/images/logos/kenyaemr-logo-nav.svg",
      "alt": "KenyaEMR logo",
      "link": "${openmrsSpaBase}/home"
    }
  }
}
If you want text instead of an image, omit src and set "name": "KenyaEMR". If both src and name are provided,
src takes precedence.
To persist your changes to your distro, follow the same steps in the section above (Steps 1-4) with the following config file snippet in the config-core_demo.json file:
{
  "@openmrs/esm-primary-navigation-app": {
    "logo": {
      "src": "${openmrsSpaBase}/logo.png",
      "alt": "Logo",
      "link": "${openmrsSpaBase}/home"
    }
  }
}
This scopes the logo to the primary navigation app only. Remember to ensure the config file is loaded (see Step 4 above).
Note: The navbar logo configuration supports:
src- URL or path to an image file. Supported formats include SVG, PNG, JPEG/JPG, GIF, WebP, and any other format supported by modern browsers. If provided, this takes precedence overname.name- Text string to display instead of an image. Only used ifsrcis empty or not provided.link- URL where the logo redirects when clicked (defaults to${openmrsSpaBase}/home)alt- Alternative text for accessibility (used whensrcis provided)
If the image you’re using for the logo is hosted outside the OpenMRS distribution, you might need to modify the Content Security Policy to allow the image to be loaded. To do so, tweak the map block that defines CSP headers in the nginx configuration file in the gateway directory. The Reference Application default allows same-origin images and data: URIs with img-src 'self' data:. Add the specific external image origin you need, and include data: explicitly if you still need data URI images.
Adding External Links to the App Menu
You can add external links to the app menu (the menu that appears when clicking the app switcher icon). This is useful for linking to external systems, documentation, or other resources:
{
  "@openmrs/esm-primary-navigation-app": {
    "externalRefLinks": [
      {
        "title": "OpenMRS Wiki",
        "redirect": "https://wiki.openmrs.org/"
      },
      {
        "title": "Community Forum",
        "redirect": "https://talk.openmrs.org/"
      }
    ]
  }
}
Each external link requires:
title- The text displayed in the app menuredirect- The external URL to navigate to (must be a valid external URL)
External links appear in the app menu alongside your application modules. They open in a new tab when clicked.
Changing the login page background
You can configure the login page background with either an image URL or a CSS color value. If both are set, the image is used.
{
  "@openmrs/esm-login-app": {
    "background": {
      "image": "${openmrsSpaBase}/login-background.jpg",
      "color": "#f4f4f4"
    }
  }
}image- URL or path to a background image. Relative paths can use template variables such as${openmrsBase}or${openmrsSpaBase}.color- CSS color value used when no background image is configured.
Adding login page announcements
You can add announcement banners above the login form, for example to warn users about planned downtime. Announcement title and text values may be literal strings or translation keys.
{
  "@openmrs/esm-login-app": {
    "announcements": [
      {
        "title": "plannedDowntime",
        "text": "The system will be unavailable on Friday from 18:00 to 19:00.",
        "kind": "warning"
      }
    ]
  }
}title- Optional title shown at the top of the banner.text- Required banner body text.kind- Visual style. Supported values areinfo,warning,error, andsuccess. The default isinfo.
Changing the favicon
To change the favicon, you’ll need to add a favicon file (typically named favicon.ico) to your distro. You’d then add the following line to the frontend Dockerfile :
COPY ./path-to-the-favicon/favicon.ico /usr/share/nginx/html/favicon.icoThis will copy the favicon to the root of the application where browsers will automatically look for it.
Important: You would need to rebuild the frontend Docker image for this change to come into effect. The favicon file should be named favicon.ico and placed in the web root (/usr/share/nginx/html/) for browsers to automatically discover it.
Changing brand colors
Implementers can change the default brand colors specified in the styleguide, overriding them with hex values that conform to their own brand colors. The default brand colors that determine how the UI looks like are defined in the styleguide configuration schema. To override them, use a configuration similar to the snippet below:
{
  "@openmrs/esm-styleguide": {
    "Brand color #1": "#005d5d", // The 'primary' color (default: #005d5d)
    "Brand color #2": "#004144", // The 'secondary' color (default: #004144)
    "Brand color #3": "#007d79" // The 'tertiary' color (default: #007d79)
  }
}
These colors impact the following UI elements:
Primary color
The primary color affects:
-
The navbar color

-
The app menu item hover color
-
The color of the selected app in the siderail
Secondary color
The secondary color affects:
- App menu items’ background color

Tertiary color
The tertiary color affects:
-
The color of buttons

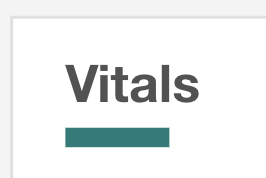
-
Widget title underline color
Setting the implementation name
The implementation name is displayed in page headers throughout O3, typically showing the name of the clinic or authority using the implementation. This appears above the page title in dashboards and other pages that use the PageHeader component.
To configure the implementation name, add the following to your configuration:
{
  "@openmrs/esm-styleguide": {
    "implementationName": "My Clinic"
  }
}
The default value is "Clinic". The implementation name can be translated—if you provide a translation key that exists in the core translations, it will be translated automatically.
Setting the page title
The page title appears in the browser tab and is used for bookmarks and browser history. To configure it, set the pageTitle property in your spa-build-config.json file:
{
  "pageTitle": "My Clinic - OpenMRS"
}Important: Changes to spa-build-config.json require rebuilding the frontend SPA to take effect.
The default page title is "OpenMRS".
Video demo
Watch the video to see a demo of how to configure branding: